
Custom Louvered Pergola: Compare Attached and Freestanding Designs

The best place for a custom louvered pergola may not be the most open part of your yard. First decide how it should relate to your house: an attached design can extend an existing patio, while a freestanding design gives you more freedom to choose its position.
That decision affects more than appearance. Consider the usable footprint, access to doors and walkways, drainage, and exposure to sun and weather. A roof or enclosure that looks right in a product listing may not suit the way your site works.
This guide compares attached and freestanding designs, then covers the site details to check before configuring a pergola. You’ll also learn how to weigh roof, screen, glass, shutter, and heater options against the comfort you want and the conditions they need to address. Cascade Shelter’s Pergola Studio 3D Configurator can help you visualize potential layouts and options as you narrow your choices. Assess the site first, then compare configurations with a clear purpose.
Table of Contents
Custom louvered pergolas: start with how the structure fits your space
A custom louvered pergola is an outdoor structure configured for a particular space, with a roof made of adjustable louvers. That definition involves two separate decisions: how the structure relates to the house and how its roof is configured. A pergola can be freestanding or attached; its roof configuration does not determine its mounting style. For background on pergola forms and uses, see Pergola.
Start with the space, not the options list. A patio beside the house may need a layout that works with a doorway or existing wall. A separate seating area may call for a structure elsewhere in the yard. In either case, plan around how you’ll use the space: where people will sit, how they’ll enter and exit, and which areas need shade.
What does “custom” mean for a louvered pergola?
Customizable doesn’t mean unlimited. The available footprint, placement configurations, roof controls, and compatible add-ons depend on the selected system. Check its exact dimensions and mounting options before deciding that a layout will work.
Keep these decisions distinct:
Placement: attached to the house or freestanding.
Roof: adjustable louvers, with operation details confirmed for the selected system.
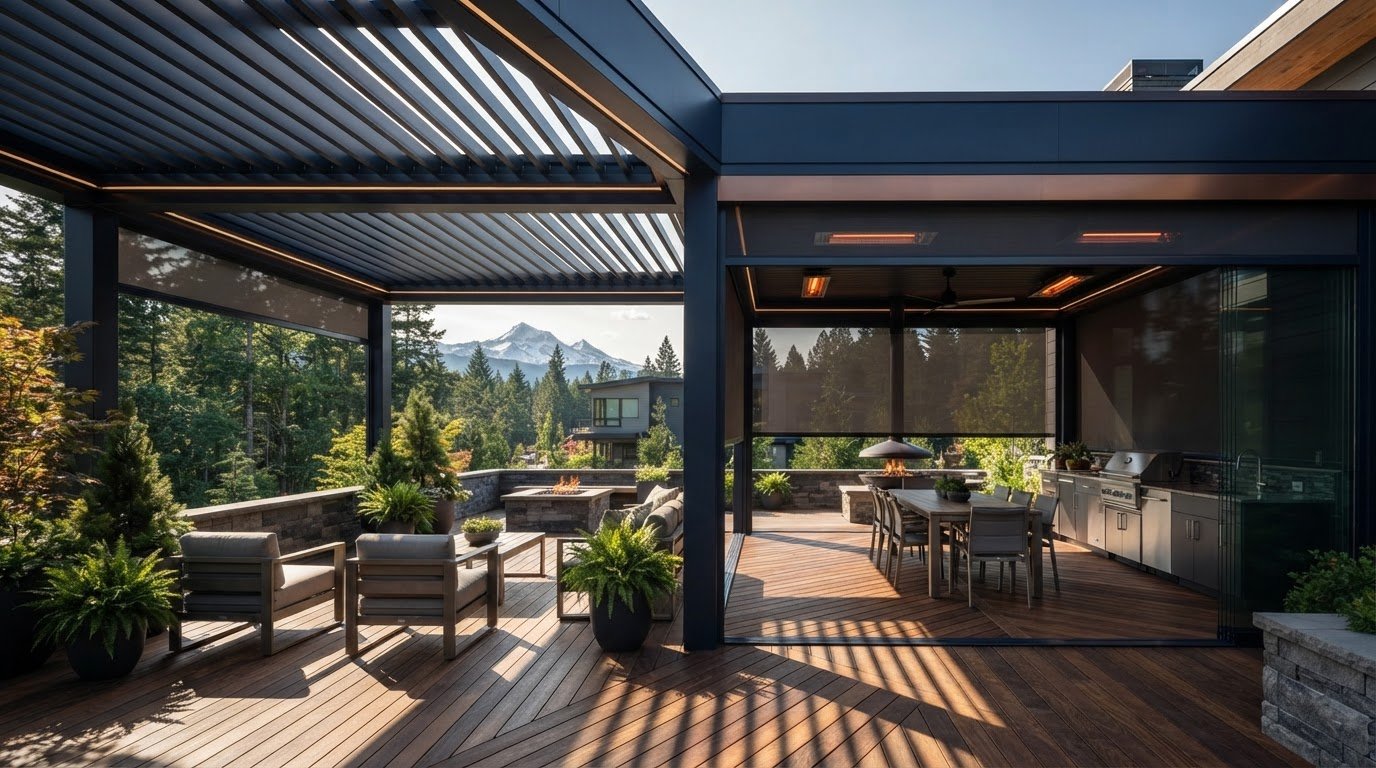
Enclosures: compatible options such as zip or roller screens, glass walls, or shutter doors.
Each choice affects a different part of the plan. Enclosures change how open the sides feel; they don’t determine where the structure can be safely supported.
Which outdoor spaces benefit from a louvered roof?
An adjustable roof lets you change the amount of sun and shade overhead. On a patio beside the house, that may be useful near a dining area or doorway. Over a separate seating area, it can help you adjust the space as conditions or preferences change. Check the selected system’s specifications to understand how its louvers operate and what controls are available.
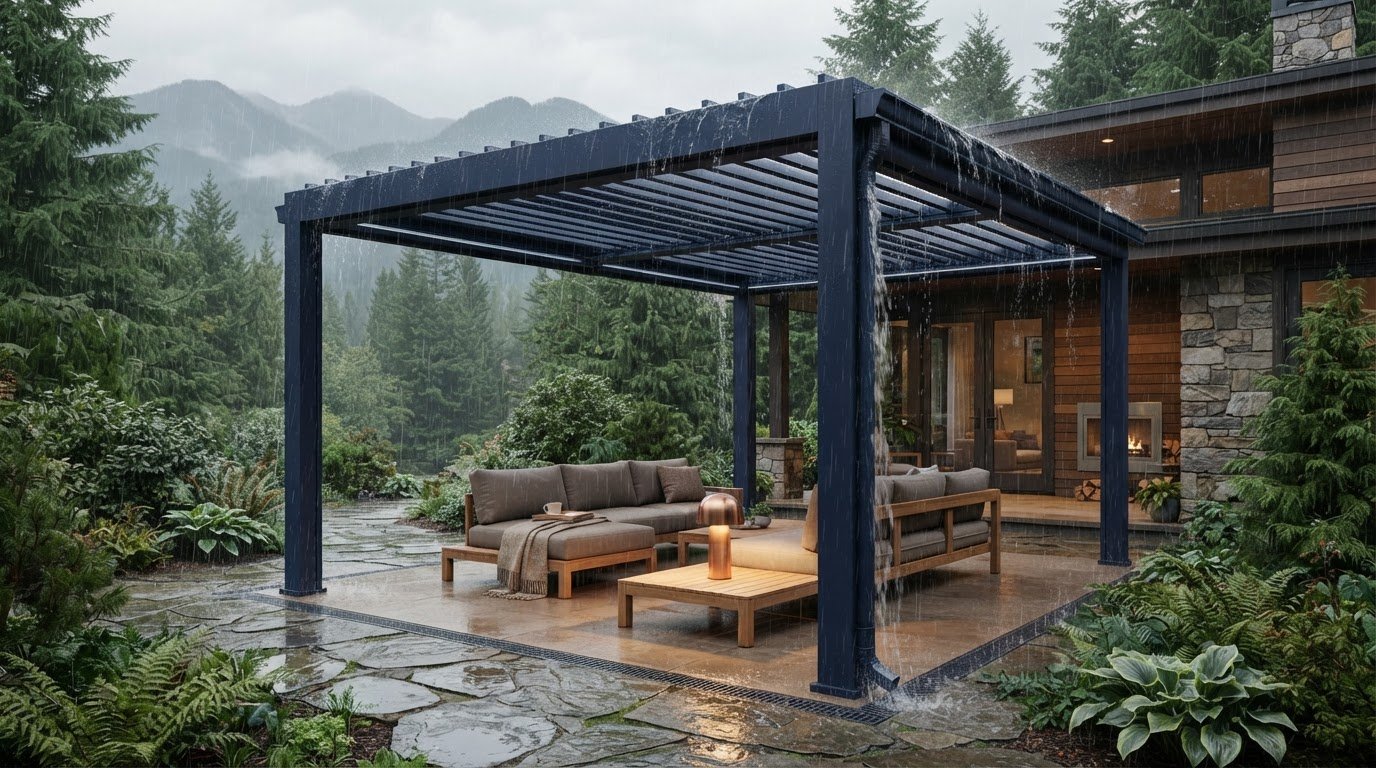
A louvered roof isn’t automatically a sealed patio cover. Weather performance depends on the system’s design, specifications, and installation. Before relying on it for rain or other exposure, confirm the product’s performance details and drainage requirements. The best starting design fits both your site and intended use, not simply the one with the longest options list.
Compare attached and freestanding custom louvered pergolas
Either layout may work, depending on the house, usable footprint, and how people will move through the space. An attached design can connect an outdoor area directly to the home, but it needs a suitable structure and connection point. A freestanding design offers more placement flexibility, but still requires appropriate support and site preparation.
When does an attached pergola make sense?
Consider an attached design if your priority is a direct transition from the home to an existing patio or doorway. Aligning the structure with that route can make the outdoor area easier to reach and arrange. But don’t assume an exterior wall can support the connection. Have a qualified professional assess the wall construction, attachment details, and water management around the connection point before finalizing the design.
When is a freestanding pergola the better fit?
Freestanding placement may suit a spot away from the house, such as a garden seating area or separate entertaining space. Check that the footprint leaves room for furniture, walking routes, and access around the structure. Look overhead, too: branches, roof edges, and other obstructions can limit placement. Being separate from the house doesn’t remove the need for site preparation.
For either style, confirm project-specific support and installation requirements with a qualified professional. A practical overview of building a pergola also explains why leveling the site and setting supports matter. Compare the proposed layout with the home, access paths, and ground conditions, then verify that the selected system supports your preferred mounting arrangement. To review an available system after those checks, see the Summit Series Pergola details.
Compare roof, controls, and enclosure options before customizing
Once the layout is settled, compare options by function. Roof controls change how you adjust light and shade. Enclosures affect how open the sides feel. A heater adds another comfort feature. These choices can work together, but they aren’t interchangeable, and compatibility depends on the pergola system.
Which louver controls and roof features should you compare?
Start with the selected system’s current specifications. Confirm how the louvers operate and check any control or power requirements. If you expect to adjust the roof as the sun moves across the patio, ease of operation may be important. If you expect to leave the louvers in one position, other design details may matter more.
Ask how the louvers move and what positions are available. Don’t assume the roof seals against rain or directs runoff in a particular way. Check the documentation for the exact configuration to verify weather performance, drainage, and installation requirements.
Do screens, glass, doors, and heaters belong in your design?
Choose accessories based on the conditions you want to manage, not simply because they appear on an options list. Zip and roller screens can help shield an outdoor space from wind, sun, and insects. Glass walls create a different kind of enclosure from shutter doors, which may offer a different balance of separation and ventilation. Confirm fit and configuration before selecting an add-on.
Infrared heaters add a source of warmth, but they don’t replace an enclosure. Check compatibility, placement, and operating requirements for the pergola system and heater.
Good customization starts with function. The covered patio described in designing functional outdoor structures is a reminder to plan an outdoor space around its use as well as its appearance. Apply the same approach to a custom louvered pergola: decide which conditions matter most, then confirm that the selected options work with the system.
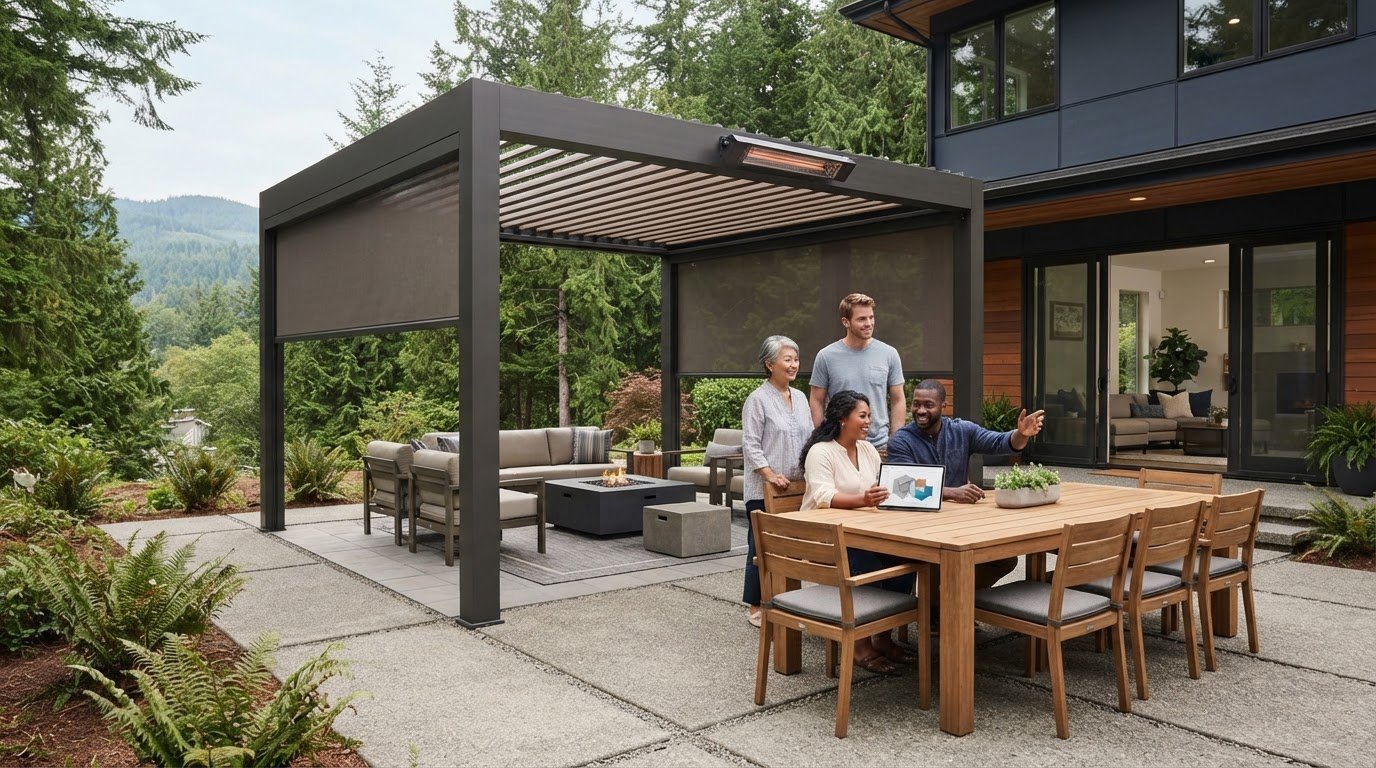
Plan a custom louvered pergola around your site in the Pacific Northwest
A layout that works on paper still needs to clear doors, fit the ground, and suit conditions at your property. Treat measurements for a custom louvered pergola as planning inputs, not proof that a structure will fit or perform as intended. Work through the site details before configuring options.
What should you measure before configuring a pergola?
1. Measure the footprint. Record usable width and depth, overhead clearance, and the positions of nearby doors and windows. Note anything that could limit the structure’s height or placement.
2. Map access. Mark the paths people use to enter, move through, and leave the area. Include doors, gates, and routes that need to remain clear.
3. Note exposure and drainage. Observe where sun falls and where water flows or collects. Mark trees, utilities, and other obstacles that may affect placement.
4. Verify the structure. Ask a qualified professional to assess a proposed house attachment, foundation conditions, and other structural requirements. Don’t assume the wall or ground is suitable.
5. Configure. Use your notes to compare layouts and compatible options, then confirm dimensions and specifications for the selected system.
What should Pacific Northwest buyers verify locally?
Conditions vary from property to property, even within the same city. For projects in Portland, Bend, and Tacoma, consider the site’s rain, wind, and snow exposure, along with slopes and drainage paths. Compare those conditions with verified documentation for the specific pergola system. Don’t rely on a broad weather-performance claim when the product’s capacity and installation requirements need to be checked.
Confirm permits, setbacks, and other project requirements with the relevant local authority. A qualified professional can assess structural conditions and help determine whether the proposed attachment or support approach suits the site. For another practical planning reference, review this engineered pergola structure buying guide.
Once you’ve made those checks, use the Pergola Studio 3D Configurator to visualize potential layouts and options. Explore pergola configurations with your measurements and site constraints in mind.
Configure a custom louvered pergola with Cascade Shelter
You’ve compared attached and freestanding layouts, considered roof and enclosure choices, and mapped the site. Carry those decisions into the configuration in the same order: choose placement, confirm site constraints, then select options supported by the system. This keeps a custom louvered pergola plan grounded in what your space can accommodate.
Cascade Shelter offers the Summit Series Pergola and Pergola Studio 3D Configurator. Use the configurator to visualize specifications and explore possible layouts and options. Treat it as a planning tool, not confirmation that a design will fit. A visual model can’t determine whether a wall, foundation, or site is structurally suitable, or whether a configuration meets local requirements.
How can a 3D configurator help you compare layouts?
Start with measurements from the property. Use the planned footprint and the locations of doors, windows, and clear routes to explore how a configuration may sit in the space. Then compare options available for the selected system. Seeing the layout can make differences easier to assess before you settle on a direction.
Keep the limits clear: visualization doesn’t confirm final fit, structural suitability, product compatibility, or compliance with local requirements. Verify each separately.
What should you confirm before moving forward?
Check the details that turn a visual plan into a workable project. Confirm available dimensions, the mounting approach, current product specifications, and which accessories are compatible with the chosen configuration. If you’re considering screens, glass walls, shutter enclosure doors, or infrared heaters, verify their fit and requirements for the specific setup rather than assuming every option works with every pergola.
Have your measurements and site photos ready. They can make product discussions more specific, but they don’t replace a qualified assessment of attachment points, support conditions, drainage, or other site requirements. Confirm permitting and structural questions with the relevant local authority or a qualified professional.
Choose the location first, verify the constraints next, then use the Pergola Studio 3D Configurator to explore options for the Summit Series Pergola. Explore Cascade Shelter’s configurable pergola options with your site information in hand.
Turn your site plan into a pergola configuration
The right design starts with its relationship to the house. Choose attached or freestanding based on the layout and support conditions, then check access, clearances, drainage, and local requirements. Once those details are clear, compare roof controls and enclosure options for your custom louvered pergola.
Cascade Shelter’s Summit Series Pergola can be explored alongside compatible screens, glass walls, shutter doors, and infrared heaters. Use the Pergola Studio 3D Configurator to visualize specifications and compare possible layouts. Treat that view as a planning tool, not a substitute for confirming dimensions, product compatibility, structural suitability, or local requirements with the appropriate professionals.
Bring your measurements and priorities into the next step. Explore Cascade Shelter’s configurable pergola options and see which configurations may fit your plan. A clear site assessment supports a more informed choice and gives you a practical starting point for shaping an outdoor space around how you’ll use it.
Frequently Asked Questions
Is an attached or freestanding louvered pergola better for my patio?
Neither style is automatically better; the patio layout and suitable support conditions decide. An attached pergola may work if you want direct access from the house and a qualified professional confirms that the wall and connection are suitable. A freestanding design may fit better if the ideal spot is separate from the home. Compare clearances, access, drainage, and intended use before choosing.
Can a custom louvered pergola be designed around an existing patio?
An existing patio can guide the planned footprint and placement, but it doesn’t confirm that a particular system will fit or can be supported there. Measure usable width and depth, overhead clearance, and the positions of doors and windows. Then check available system dimensions, mounting options, and site requirements. Have a qualified professional assess structural suitability before finalizing the plan.
How do I choose the right size for a custom louvered pergola?
Start with how you’ll use the space, then measure the area available around furniture, doors, and walking routes. Record width, depth, and overhead clearance, and note trees or other obstructions. Treat these measurements as planning inputs, not final approval. Compare them with the selected system’s available dimensions, and have site fit and structural requirements confirmed before moving forward.
Can louvered pergolas be installed in Portland, Bend, or Tacoma?
Cascade Shelter offers pergola systems and accessories for customers in Portland, Bend, and Tacoma. That doesn’t mean every configuration suits every property, or that Cascade Shelter provides in-house installation labor. Check the site’s exposure and drainage against product documentation, and confirm local project requirements with the relevant authority or a qualified professional. Confirm installation arrangements separately.
What should I check before attaching a pergola to my house?
Have a qualified professional assess the wall construction, proposed connection point, attachment details, and water management around the connection. Don’t assume an exterior wall can support a pergola. Also confirm clearances, system compatibility, and project-specific structural and local requirements before selecting dimensions or accessories. The attachment needs to suit both the house and the pergola system.
Do custom louvered pergolas include screens, glass walls, or heaters?
Not necessarily. Options depend on the selected system and configuration. Cascade Shelter sells the Summit Series Pergola with matching options that include zip and roller screens, glass walls, shutter enclosure doors, and infrared heaters. Confirm which accessories are compatible with the specific setup. Each serves a different purpose, so choose based on the enclosure and comfort needs of your space.
Does a pergola configurator confirm that my site is ready for installation?
No. A configurator helps you visualize specifications and compare possible layouts, but it doesn’t assess the property. Use confirmed measurements to explore a configuration, then separately verify dimensions, structural suitability, attachment or foundation conditions, and local requirements. For projects in Portland, Bend, or Tacoma, check site exposure and drainage against the selected system’s documentation.
Comments